Useful Links
How do translations work?
- Only specific people (Verified Translators) can submit translations to the website
- To become a Verified Translator (whether for an existing language, or to add a new one) you need to:
- Email WST and your local/regional delegate asking WST to add you as a translator for your requested language. Your delegate will need to vouch for you being trusted to translate, so check with them before you send the email.
- Being a translator is an ongoing job: As the website is updated, more translations come out. Verified Translators receive email notifications when there are new strings (words) to translate.
- How much work is it to translate the website into a new language?
- There are ~20,000 words for the main website, although many of them are very simple and quick.
- There are ~20,000 words for the regulations. These translations are more difficult - they are made up of full, complex sentences.
- Verified translators submit translations to the WCA via Weblate
The rest of this guide deals with how to use Weblate, as well as some notes for WST on how to manage translators.
Guide for Translators
The WCA uses Weblate for managing its translations. This guide covers the basics of how to use Weblate, as well as some important information on translating special keys.
- Basic Weblate Setup
- How To Translate
- Tips and Tricks
- Translating Similar Languages
- Software Overview
Basic Weblate Setup
Weblate has a lot of options, but the basic usage is very simple - in reality, you only need to worry about a few buttons1. The basic process described below is all you need.
-
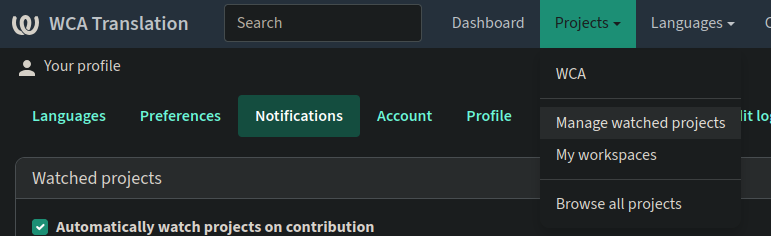
Go to “Projects” -> “Manage Watched Projects”
-
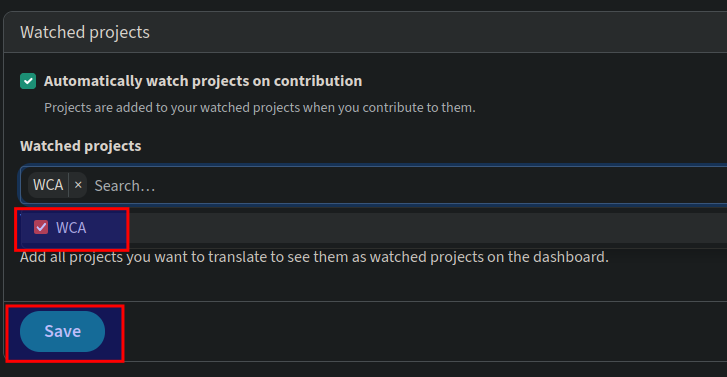
Search for and select “WCA” in the Watched Projects section, then click “Save”
-
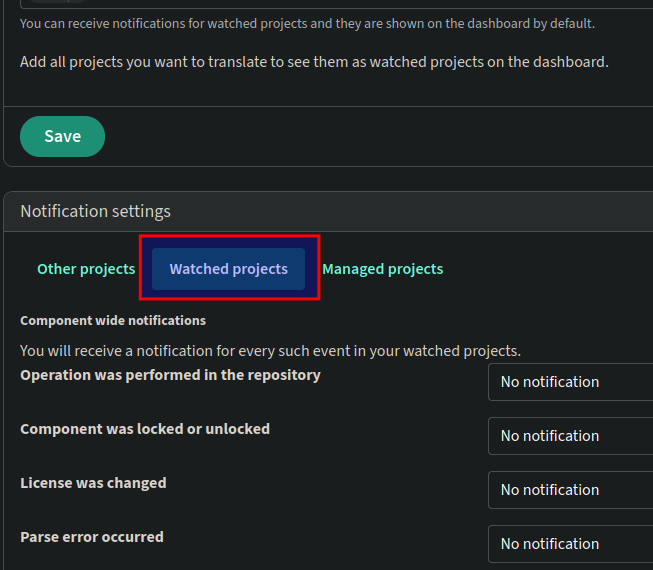
Go to the “Notification settings” section just below where you selected “WCA” as your project. Make sure “Watched projects” is selected
-
The only notification WST recommends is “Instant notification” for “String is available for translation” under the “Translation notifications” heading. However, you may set up your notifications however you want.

-
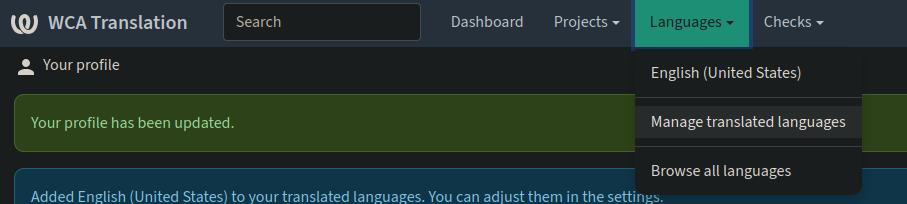
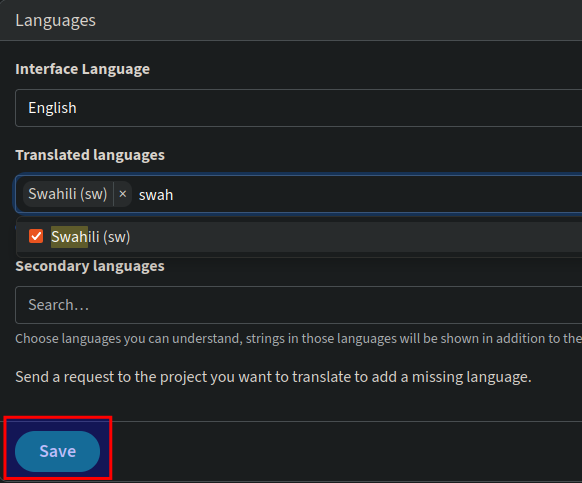
Go to “Languages” -> “Manage Translated Languages” -> search for and select your language
-
You’ll see that all the languages are available here - even though it looks like you can select them, you will only be able to provide translations for the language(s) you are a Verified Translator for
- You can change your “Interface Language” if you want to use Weblate in a language of your choice
- You can also select a “Secondary language”. This lets you see more translations in other languages which might help (for example, seeing both the English and European Spanish translations when doing a Latin American Spanish translation)
How To Translate
Navigating To Your Language
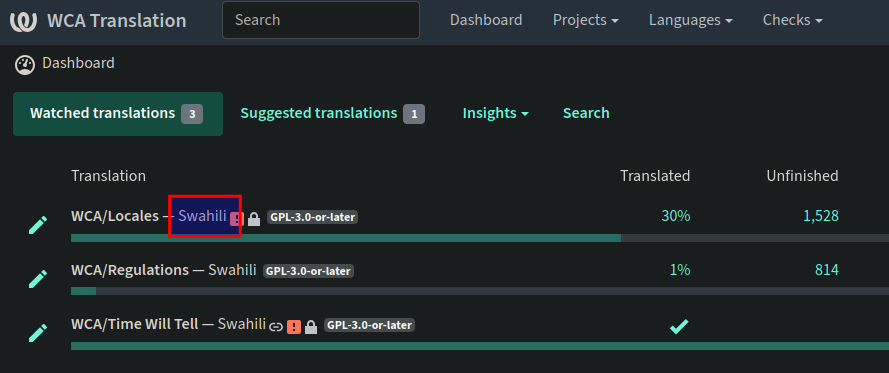
Now, you can see your translation options in the “Dashboard”. You’ll notice three options (called “projects”):
- WCA/Locales: These are the translations for the main WCA website.
- WCA/Regulations: This is the regulations translation for your language.
- WCA/Time Will Tell: This can be safely ignored.
Choose one by clicking on the language name next to your preferred project - ie, for the title WCA/Locales — Swahili, click on the Swahili text.
Submitting Translations
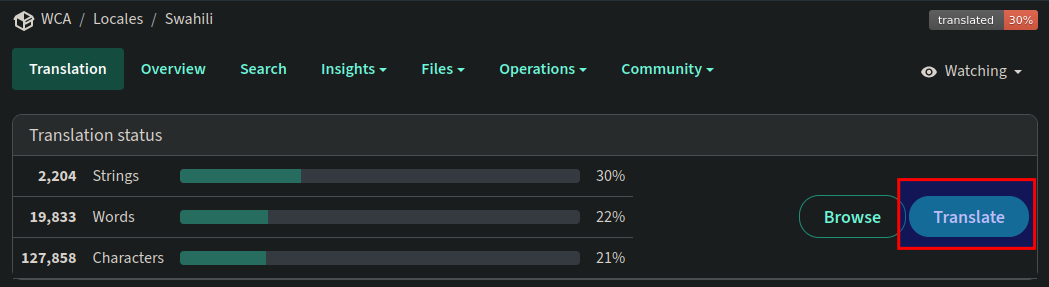
From your language’s Translation page, click on “Translate”.
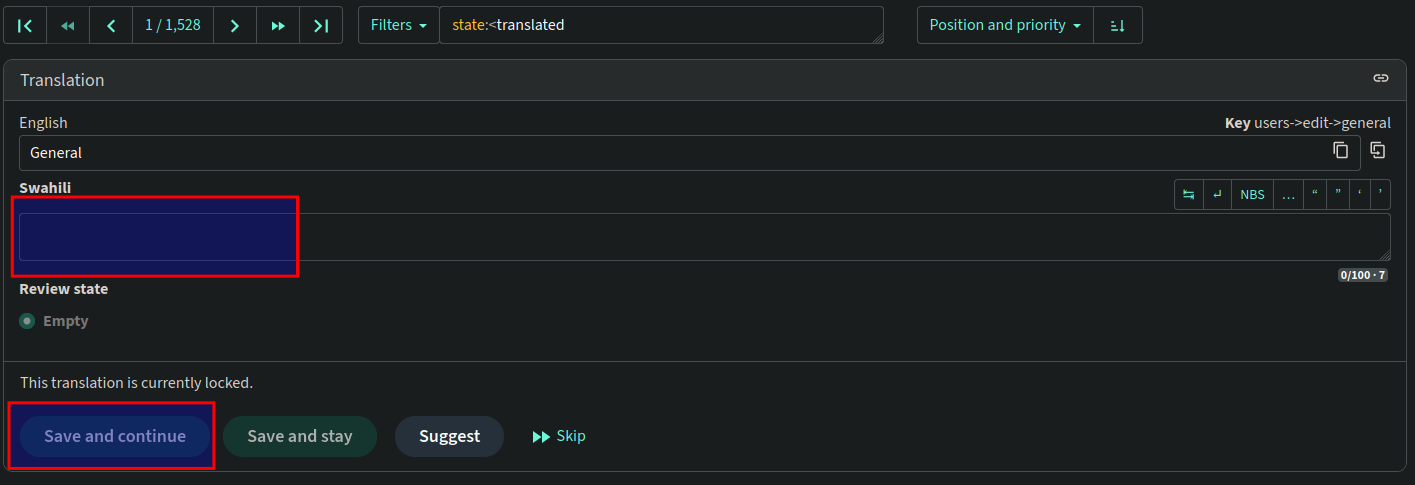
The usage here is straightforward:
- Enter the translation for the base language (usually English) in the box with your language’s label
- Click “Save and Continue”
- Keep going on the next translation
- If you don’t want to do a translation now, you can click “Skip”
- If you aren’t sure, you could “Suggest” a translation and other translators for your language can take a look at it
Tips and Tricks
-
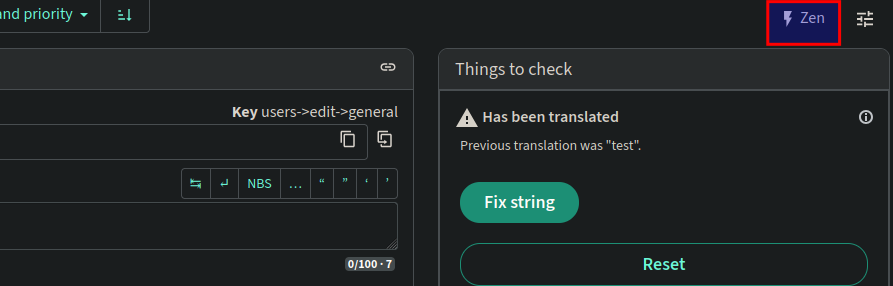
If you want to simplify and speed up the translation process, you can use “Zen Mode” by hitting the “Zen” button in the top right of the screen. (In this mode, translations are saved automatically when you navigate away from the cell where you entered the project.)
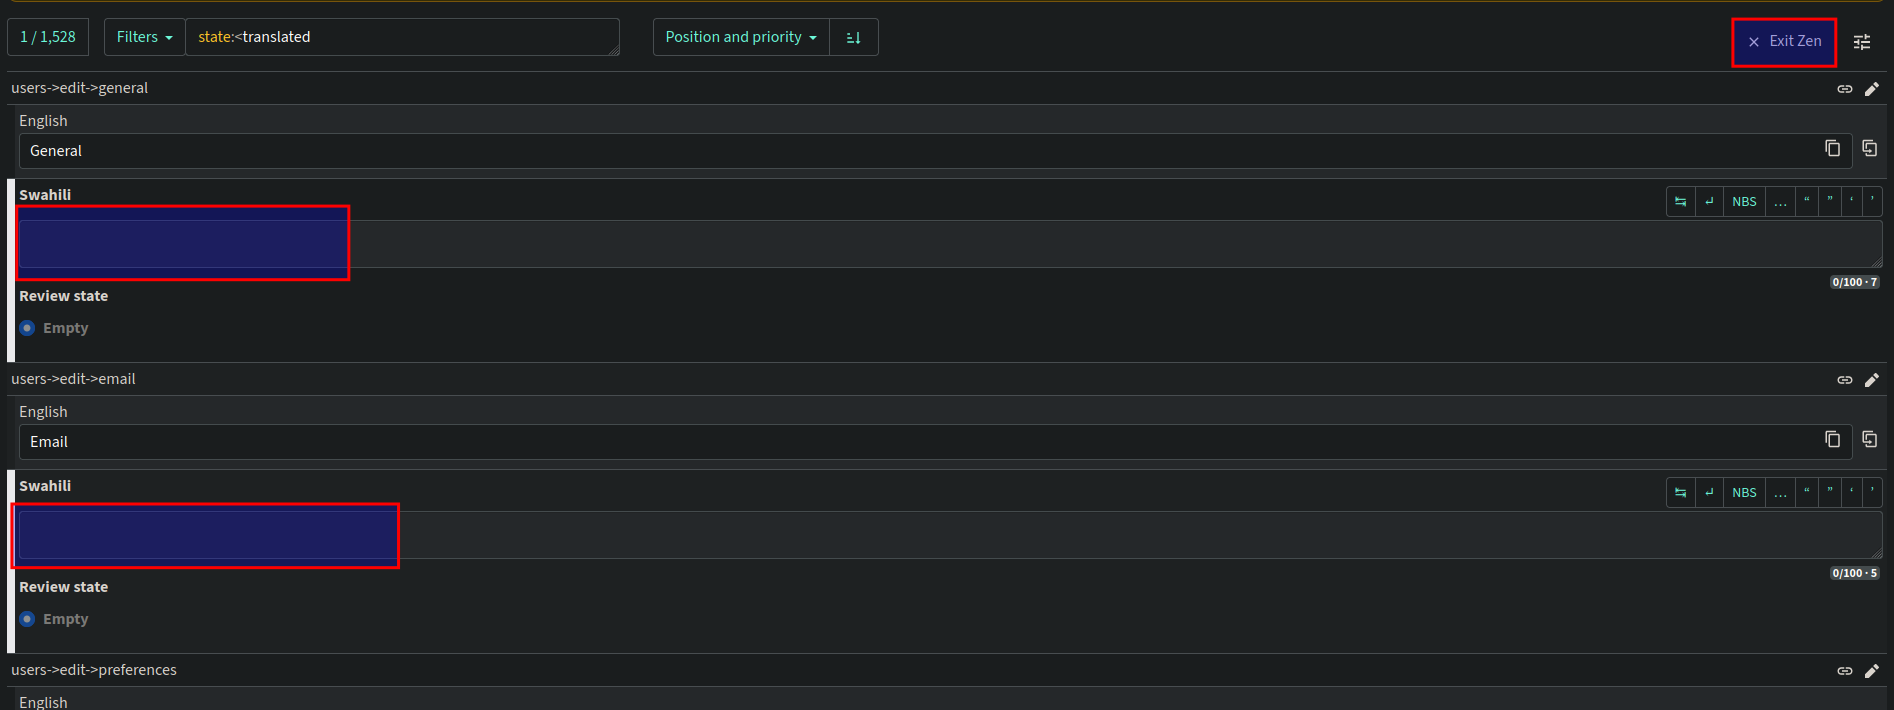
- If you’re uncertain about the context of a translation, use the “Nearby strings” menu to see other strings used in the same section of the website
- You can also use “Similar keys” and “Other languages” in the Translate menu to help with translation wording
Translating Similar Languages
This applies if you are doing a translation for a language that already has a similar translation (eg, adding a French Canadian translation when French is already translated)
We suggest the following approach:
- Follow steps in Basic Weblate Setup to set your Secondary Language to the similar language (eg, French)
-
Use this button to copy the text from your Primary or Secondary language straight into the translation - this lets you move very fast through cases where words are the zoom
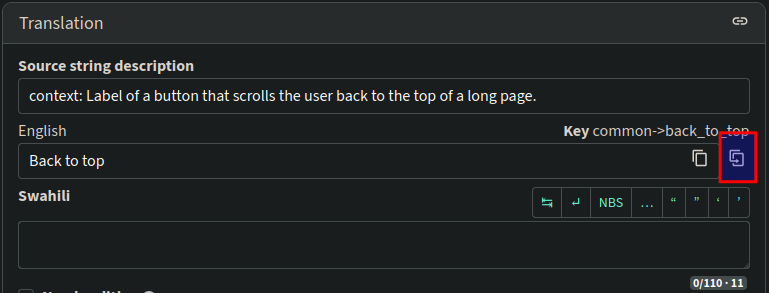
- The button is also available in Zen Mode if you want to move even faster
Dealing With Special Keys
Before you rush into the application to happily translate the locale file, here is some basic information about how translations work, please read them carefuly!
When we want to output a translated sentence (also known as string) on the website, we use a reference key that is then used by our application to get the actual text in the language of the user, if available. For example if we want to show the title of the Competitions index page, we use the key competitions.index.title that then gets replaced by “Competitions” if the language is English, or “Compétitions” if the language is French.
Most of the keys need translation as simple as that, however some of them are slightly more complicated and are worth explaining. There are basically 3 things you need to be careful about, and they are described in the next 3 subsections.
Using Variables
Sometimes translated strings contain variables. For example let’s look at the waiting list message displayed when your registration at a competition is pending:
waiting_list: "You are currently number %{i} of %{n} on the waiting list."
In this example, %{i} will be replaced by your position in the waiting list, and %{n} will be replaced by the total number of people in the waiting list. When translating this you can move them around to where it fits best your language, just remember to use them ;)
Just putting here the French translation to display an example:
waiting_list: "Votre inscription est en attente, vous êtes en position %{i} sur %{n}."
As you can see, the variable names (i and n) stay the same: please do not change the variable names!
Using HTML
Sometimes translated strings will contain html (this is the language used to format text in your browser). It’s usually used on a specific part of the sentence, so please keep the html on the same part of your translation. For example the hint about name given to a user when registering is the following:
name: "Enter your full name correctly, for example <strong>Stefan Pochmann</strong>. Not sloppily like <strong>s pochman</strong>."
Here <strong></strong> is use to put the examples in bold, when translating the string please also use <strong></strong> on your example names. On this particular example, you should also feel free to edit the examples to what make most sense in your language/culture. For example in France the capitalization mistake Stefan POCHMANN is more present than others, so the French translation looks like:
name: "Entrez votre nom complet correctement, par exemple <strong>Stefan Pochmann</strong>. Pas négligemment comme <strong>s pochman</strong> ou <strong>Stefan POCHMAN</strong>."
Note: some strings may contain both variables and html. Here is an example with the registrations opening message:
will_open_html: "Registration will open in <strong>%{days}</strong> on %{time}."
Dealing with pluralization
The last tricky kind of keys is the one used to pluralize words. Pluralization rules depend entirely on the language, so the website has a flexible approach to handle it (and knows how to handle it for every language); lets take the example of the pluralization of “day(s)”, which has the key days:
days:
  one: "1 day"
  other: "%{count} days"
In English, if the number of days is “1”, you want to display “1 day”, otherwise you want to display “%{count} days”, with count being replaced by the actual number of days.
But in other languages the rule may be different, for example the same key in French looks like this:
days:
  zero: "0 jour"
  one: "1 jour"
  other: "%{count} jours"
(we don’t pluralize “word” if there is no “word”)
In Jonatan’s application such keys are detected and it will automatically enforce the correct set of keys to be used, based on the target language.
Software Overview
This part is only relevant to developers/WST members.
Adding A Verified Translator
Note: Please receive confirmation from delegates in the user’s region, and existing Verified Translators for the language, before adding someone as a Verified Translator.
Verified Translators can be added to a language from the (Translators panel)[https://www.worldcubeassociation.org/panel/admin#translators]
Nothing needs to be done in Weblate to grant translation permissions there - Weblate pulls its permissions from the WCA website when the user logs in to Weblate via OAuth.
Adding a new language
First, create a translator group for the language.
Currently, this must be done with the Rails console. Find the i18n code for the relevant lanugage (in this example, we use Hindi: hi)
- Add Group Metadata for the new translator UserGroup we’ll create (and assign it to a variable so we can reference it in the next command):
hindi = GroupsMetadataTranslators.create(locale: 'hi') - Add the UserGroup itself
UserGroup.create(name: 'Hindi', group_type: 'translators', is_active: true, is_hidden: false, metadata: hindi)
Once this is done, you can add verified translators for the new language from the (Translators panel)[https://www.worldcubeassociation.org/panel/admin#translators]
To activate a locale:
New information: We only add a locale to the relevant files once we have a translation available for it from Weblate - otherwise it becomes available in the public-facing locale selector.
See (this PR)[https://github.com/thewca/worldcubeassociation.org/pull/10986/files] for a reference of adding a new translation
Old information (elements may still be relevant):
- Add the locale with the language information to the available locales (in
WcaOnRails/config/locales/locales.rb) - Activate the
fullCalendar/momentlocale in theWcaOnRails/app/assets/javascripts/application.js(look at the numerous examples)
You can check missing translations by running i18n-tasks missing in the WcaOnRails directory.
- Note: 5 translations are expected to be missing (those under ‘datepicker’ or ‘timepicker’) for every language but English.
Language codes vs region codes
In most cases, language code and region code will be the same. However, it is important to know that these two different types of code exist. Most places in our codebase will only reference the language code, but in some places (eg locales.rb) both will appear:
en: {
      flag_id: "gb",
      name: "English",
    },
In this case, en is the language code, while flag_id is region code, which may have a different ISO code - as is the example with English (the language), where the Great Britain flag is used to represent it. (This is a good illustration of why using flags to represent languages is not generally not a good idea.)
-
If you’re wondering why there are so many buttons - Weblate is not coded by the WCA. It is open-source software which we are just hosting our own version of - so we can’t easily control what options you do/don’t see. ↩